 When you’re creating Smart Lists, or editing existing/suggested ones, you’ve got a lot of power between the filters you set up and the settings you select. In this post we’ll go over the “Edit Smart List” screen so that you know what functions/options are available to you.
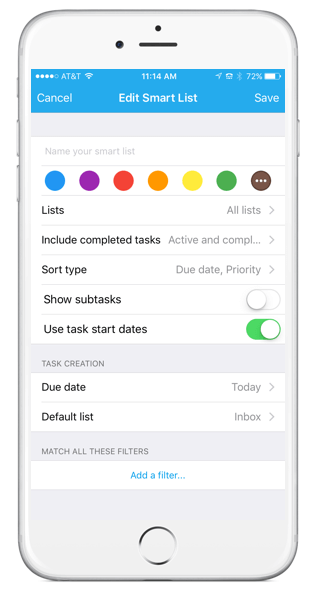
Name your Smart List – Pretty standard and simple, you can give your Smart List whatever name you want.
Assign a color to your list – You can customize the color of your list. One tip here is to assign like lists the same color. For example, a few of us on the Todo Team will assign the same color to Smart Lists relating to personal tasks and another color to those lists relating to tasks for work.
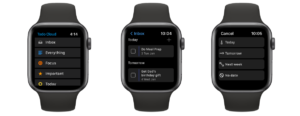
Lists – This is where you can select which Custom Lists will be included in the filter. This is helpful when you’re trying to separate your Smart Lists by types of tasks. For instance, I may want a “Next Seven Days” for work and a “Next Seven Days” for home. I would simply create two lists with the “Next Seven Days” criteria, rename them appropriately and only include lists relating to work on one and home on the other.
Include completed tasks – This option allows you to determine whether or not completed tasks will show up in the Smart List. Some like to have this because they like to not only know what needs to get done, but also identify what has been done (this is especially helpful when these tasks may come from shared lists). Others don’t want to see completed tasks because they want to only use Smart Lists to identify what needs to get done. Whatever your fancy, you have the control here.
You have the options to show:
- Active and completed
- Active only
- Completed only
And when using Completed tasks you can set the list to show completed tasks since:
- Yesterday
- 2 days ago
- 3 days ago
- 1 week ago
- 2 weeks ago
- 1 month ago
- 1 year ago
Sort type – This options allows you to change the order in which tasks appear in your Smart List. Here are the current options:
- App default – whatever your app default settings are
- Due date, priority
- Priority, due date
- Alphabetical
Show subtasks – This option allows you to determine whether or not you want subtasks that meet the appropriate criteria to be shown. Here are a few important things to know about how this feature works:
- If “Show subtasks” is off, the project for any subtask will show up in the Smart List, but not the the subtask itself. You will be able to click into the project to see all subtasks in that project
- If “Show subtasks” is on, the project for the subtask will not show up, but the sub task itself will
- Whether or not “Show subtasks” is on or off, the count associated for the Smart List will remain the same – this is meant to give you a quick “volume check” of how much is included in that Smart List when on the list view.
Use task start dates – The let’s you use a task’s start date to assist in determining when to show a task. With “Use task start dates” set to on, a task with a start date can appear earlier in your task lists than when it is actually due, giving you a chance to start working on the task.
For example, let’s say you had a task named Science Fair Write-up with a due date two weeks from now. Since it’s something you know will take you about a week to get this done, you can set a start date on the task one week from now. By doing this, your tasks will start appearing in your list of things Today one week from now to help remind you to start working on it instead of at the last minute when it’s due. If the “Use task start dates” is set to off, the task wouldn’t appear in your Today section until the actual due date.
We recommend keeping the Use task start dates set to on so that if you ever set a start date, you’ll start to see the task earlier than its start date.
Task Creation – This section allows you to determine where and how tasks that are created from within a Smart List get placed. You are able to set the following:
- Due date
- Default list
For example, I could be viewing a “Next Seven Days – Work” Smart Lists when I’m planning and may be reminded of another task that I need to get done at work. If my “Default list” is set to “Work” and “Due Date” set to “Tomorrow”, any task created when I’m viewing my “Next Seven Days – Work” Smart List will show up in my “Work” custom list with a due date of tomorrow.
Match all these filters – we’ve written the following posts to help you understand the filters that are available to you.
Here are a few more resources to help you understand how to use Smart Lists
Enjoy!